Floral Centrepiece DIY
What's so great about this project is that you can customise it with your choice of size of tray, color, type of flowers and more. For fall this would look fantastic with gorgeous sunflowers, in the spring - why not try tulips! Plus, you don't need to use real flowers like I did, you can always use faux flowers to create a centrepiece that will last longer.

So, here's what you'll need to make your own gorgeous centrepiece that is sure to wow your guests!
A pair of scissors to cut your flowers
A knife to cut your foam block
Flower foam (find this at any craft store or florist)
Flowers of your choice *I'll get into how many you'll need below
Spray paint in the color of your choice

Your first step is to spray paint your tray. I chose to paint mine white as I wanted it to almost blend in with my white table so that the flowers would be the main focus. However, any color that you want is just fine! Get creative and go metallic or even patterned - whatever color suits your theme or palette is just perfect.
From my many years of spray painting experience I find it's best to do several light coats rather than to try to get everything covered in only one or two. Also, make sure to spray your tray in a well ventilated area such as your garage with all the doors and windows open or outside on your deck like I did. You don't want to be breathing in those paint fumes!

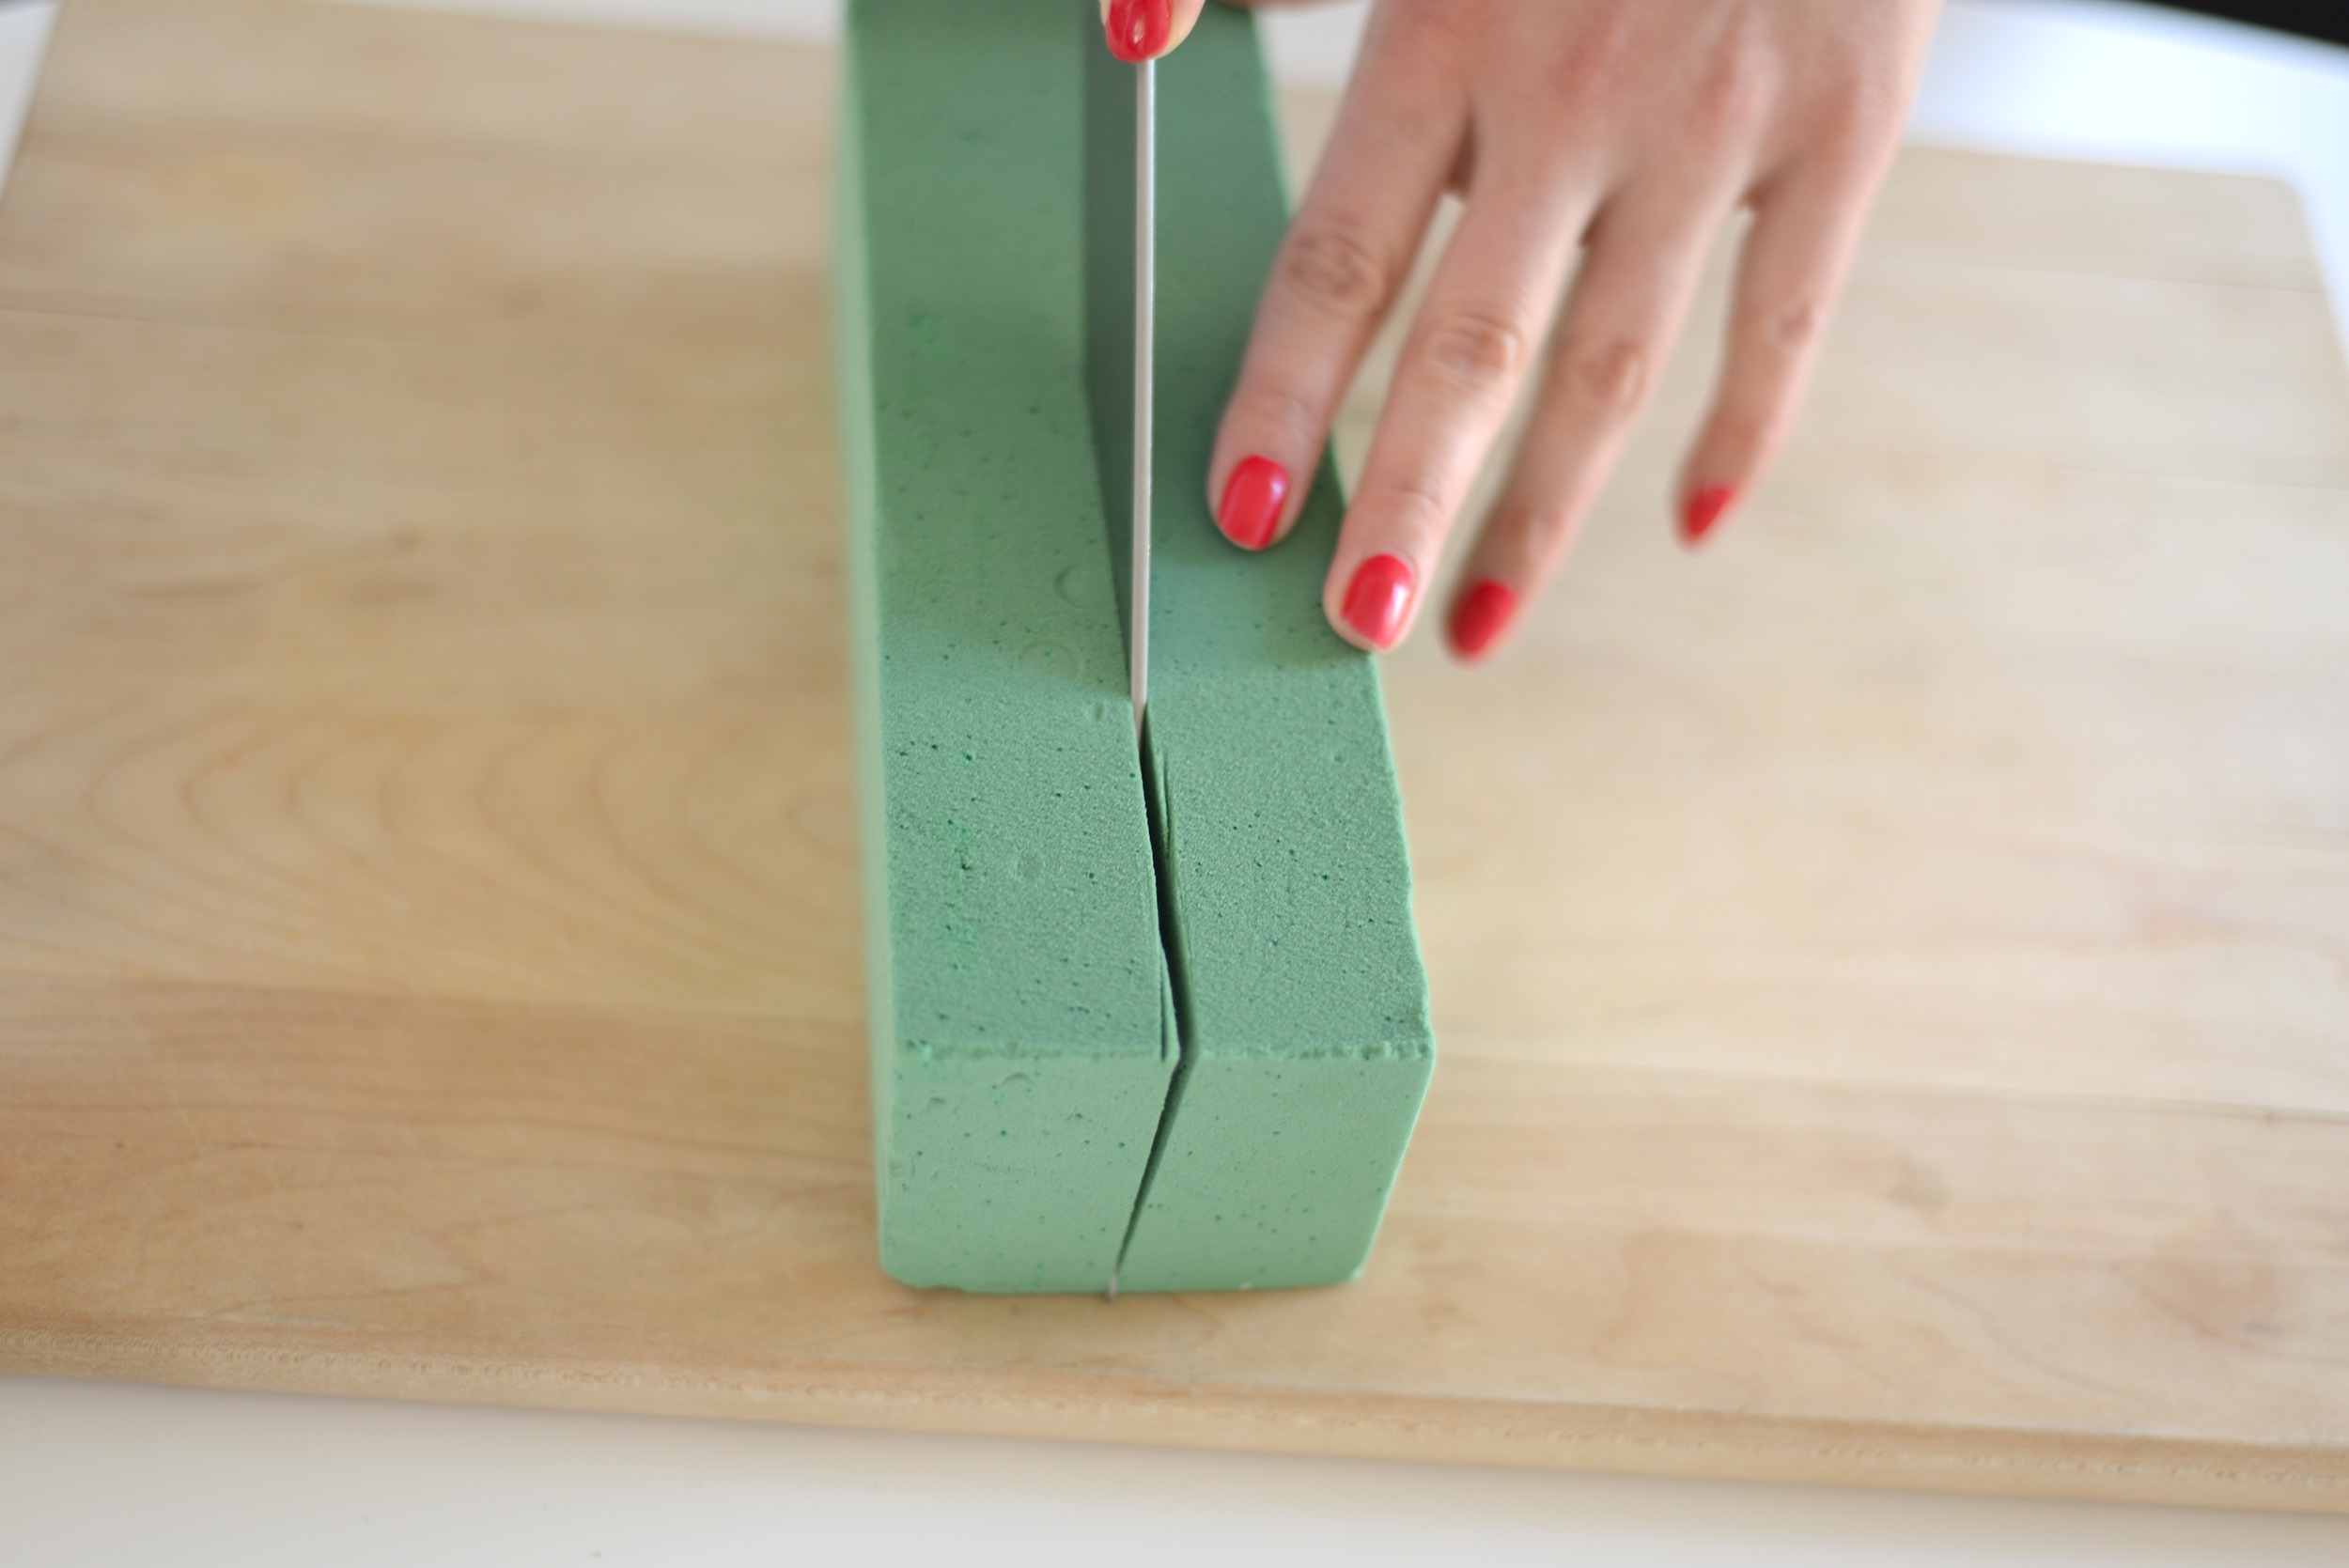
While your paint is drying, grab your flower foam and start cutting away. It's helpful to take a look at the configuration you'll need the foam to be in before you start spraying your tray.
With my blocks I chose to cut them in half width wise, making them thin enough to sit in the tray. As I went along I actually cut them again to make them thinner so I'd suggest cutting them into thirds. You'll save yourself foam and money!
The foam is very easy to cut using a kitchen knife so the actual cutting isn't hard at all and as you'll see from the photos of mine - they do not need to be perfect or even or symmetrical at all. This DIY is very forgiving :)

Once your tray has dried it's time for the fun to begin. Right off the bat you'll want to decide if you need to wet your foam or not. This will be based on whether your flowers are real or fake, and how long you want the centrepiece to last. Carnations are very hearty flowers (which is why they were perfect for this DIY) so from my past experience, I knew they could last all day without water if needed so I didn't wet my floral foam. If you do decide to use water, lay a piece of foil, plastic or a liner such as drawer/kitchen cabinets liner to protect the bottom of your tray from water damage but know that it might be a possibility.

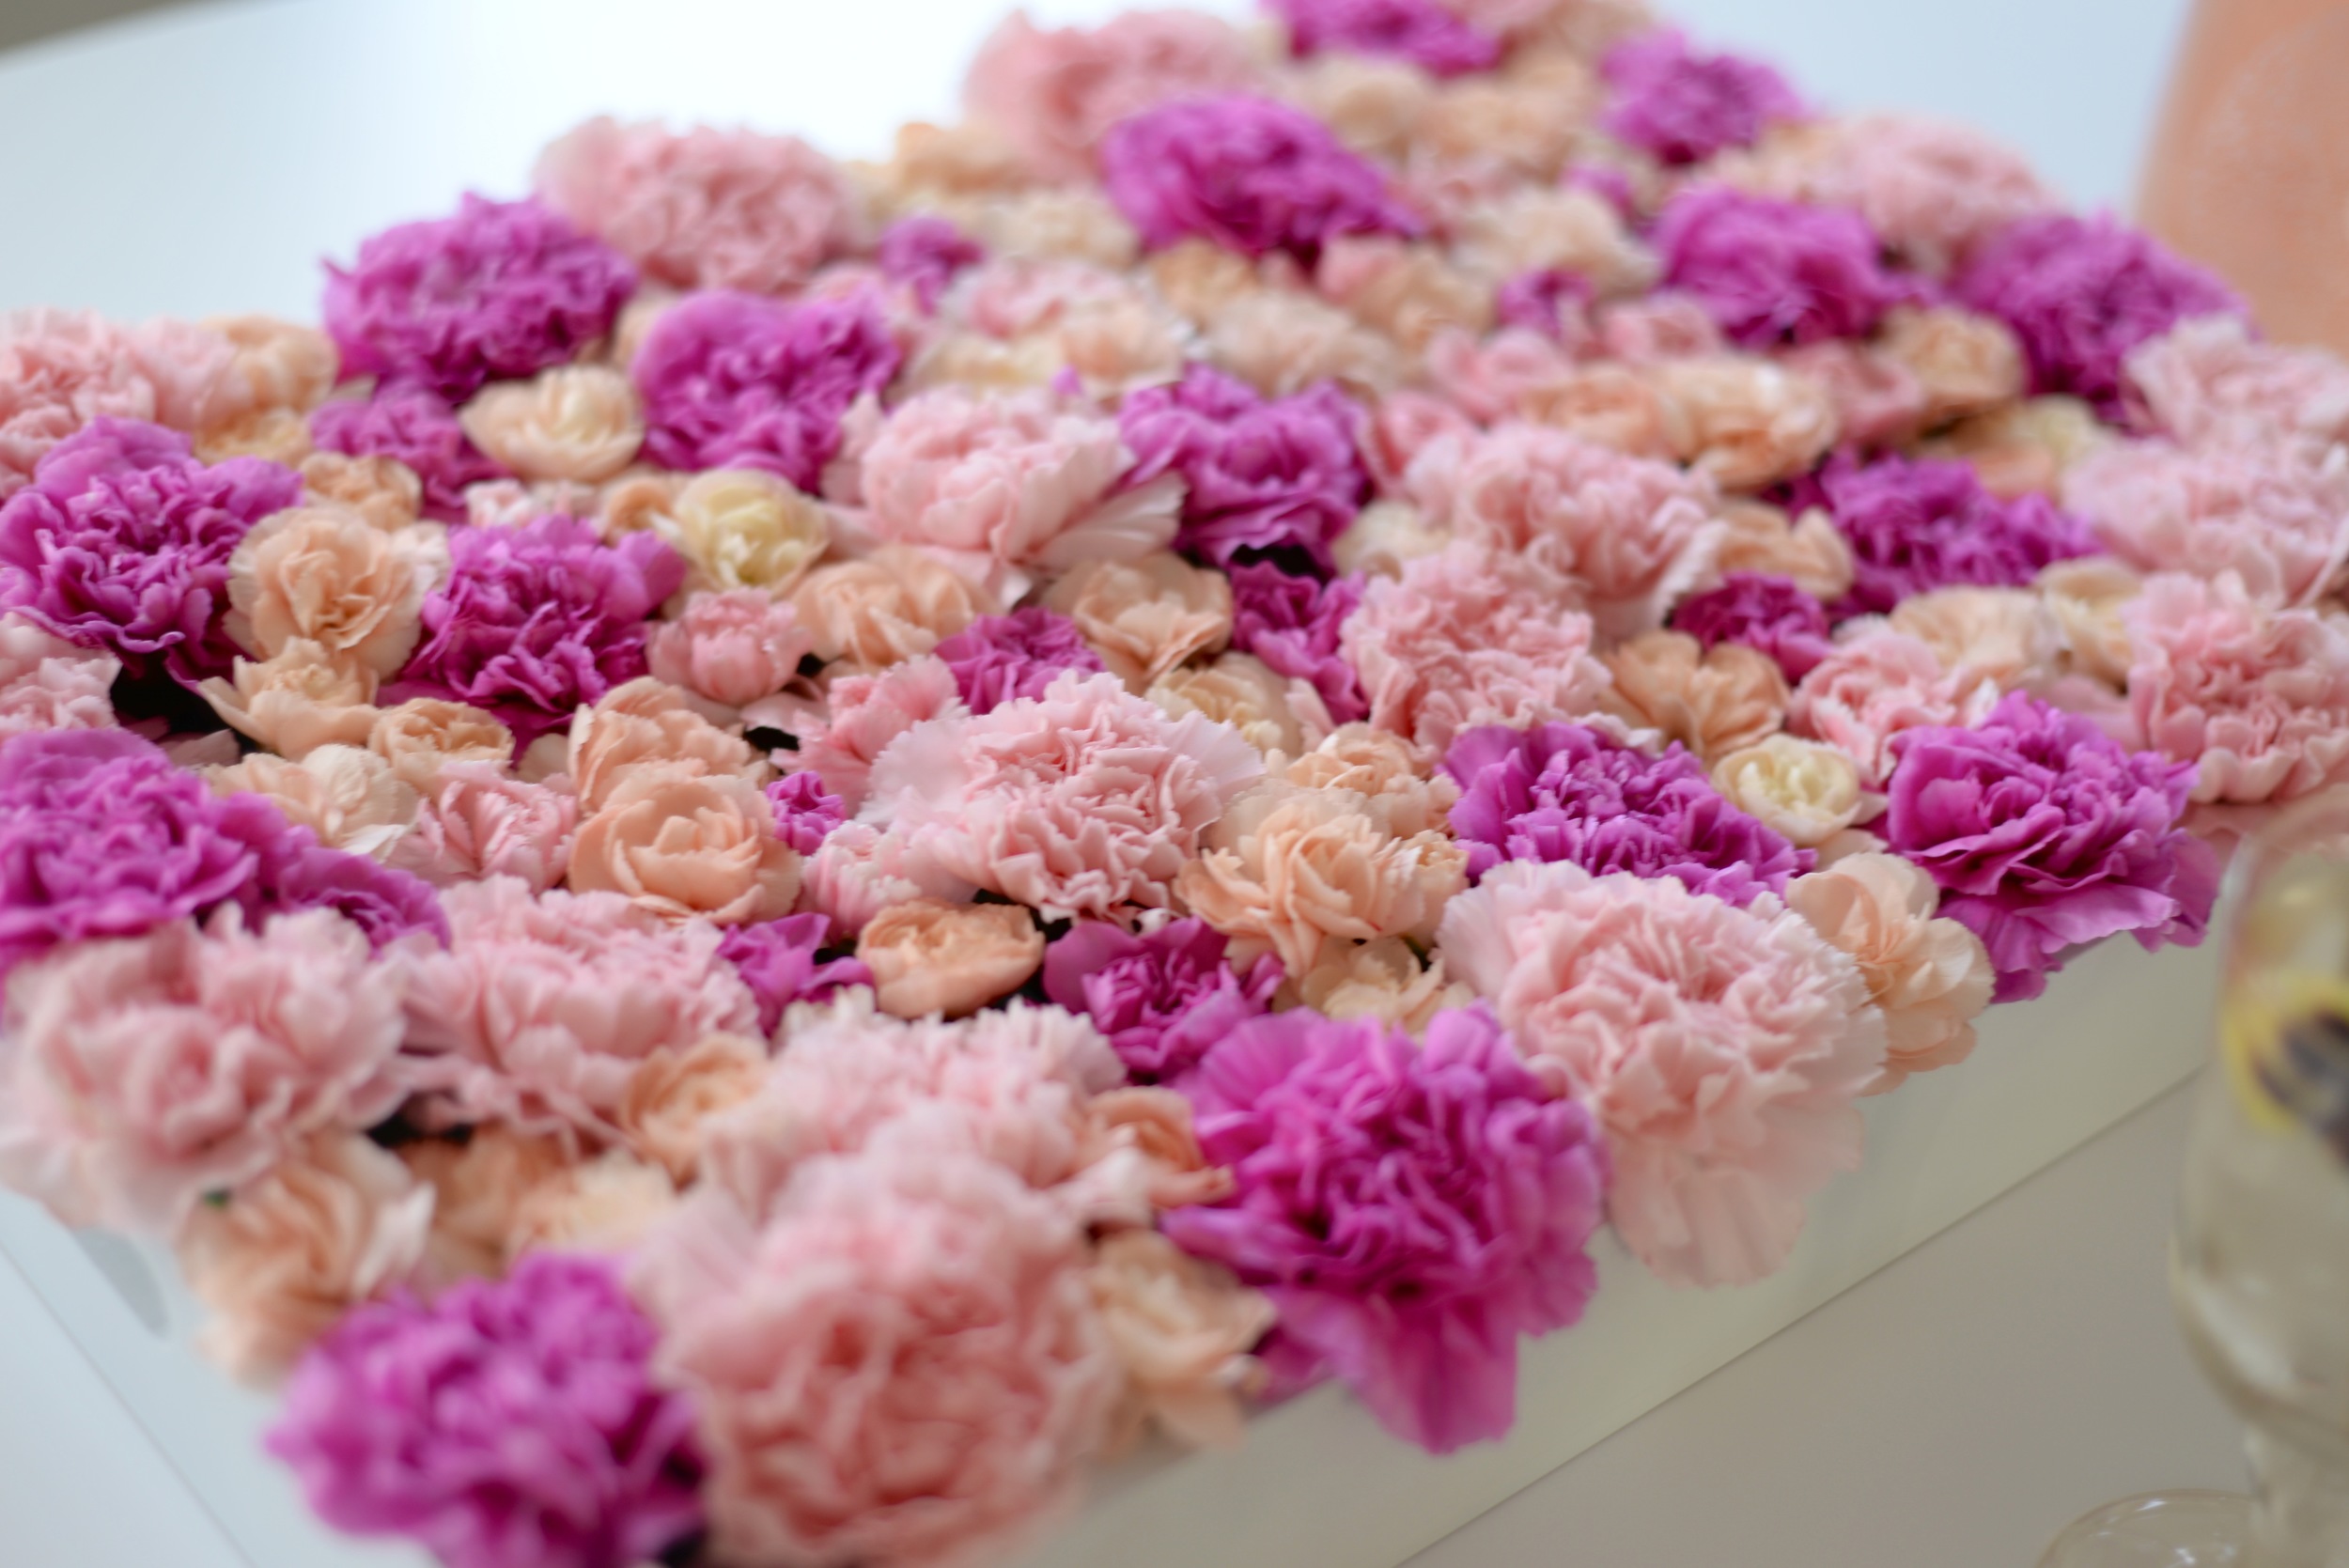
So now let's talk about your flowers. I decided I wanted real flowers and that I wanted to use carnations right away. Carnations are a tough flower that can stand up to a bit of abuse which was good for this DIY. They're also really inexpensive from the grocery store also which is a bonus.
The number of flowers you'll need is going to depend on the type of flower you use. For example, gerber daisies and sunflowers are larger flowers that will cover more surface area, meaning you'll need fewer. With carnations, or tulips or roses, you'll need quite a few more.
I bought 2 dozen large carnations and 4 packs of small carnations which had 20+ flowers per bunch and spent less than $50 on flowers. Again, you can also use faux flowers from the dollar store or craft store or use a few real and a few fake like I did here to save on costs also if that's a concern.

Now for the fun part! To save time and make the process smooth, I suggest cutting all of the flowers right from the start. I left my stems about 1" long, just long enough and sturdy enough to poke into the floral foam but not so long that they hit the bottom of the tray through the foam.


Once all of your flowers are cut, it's time to start placing them! I started around the edges using the larger flowers to begin. Once I finished the perimeter, I began filling in, without any rhyme or reason really, just placing flowers to fill any gaps.


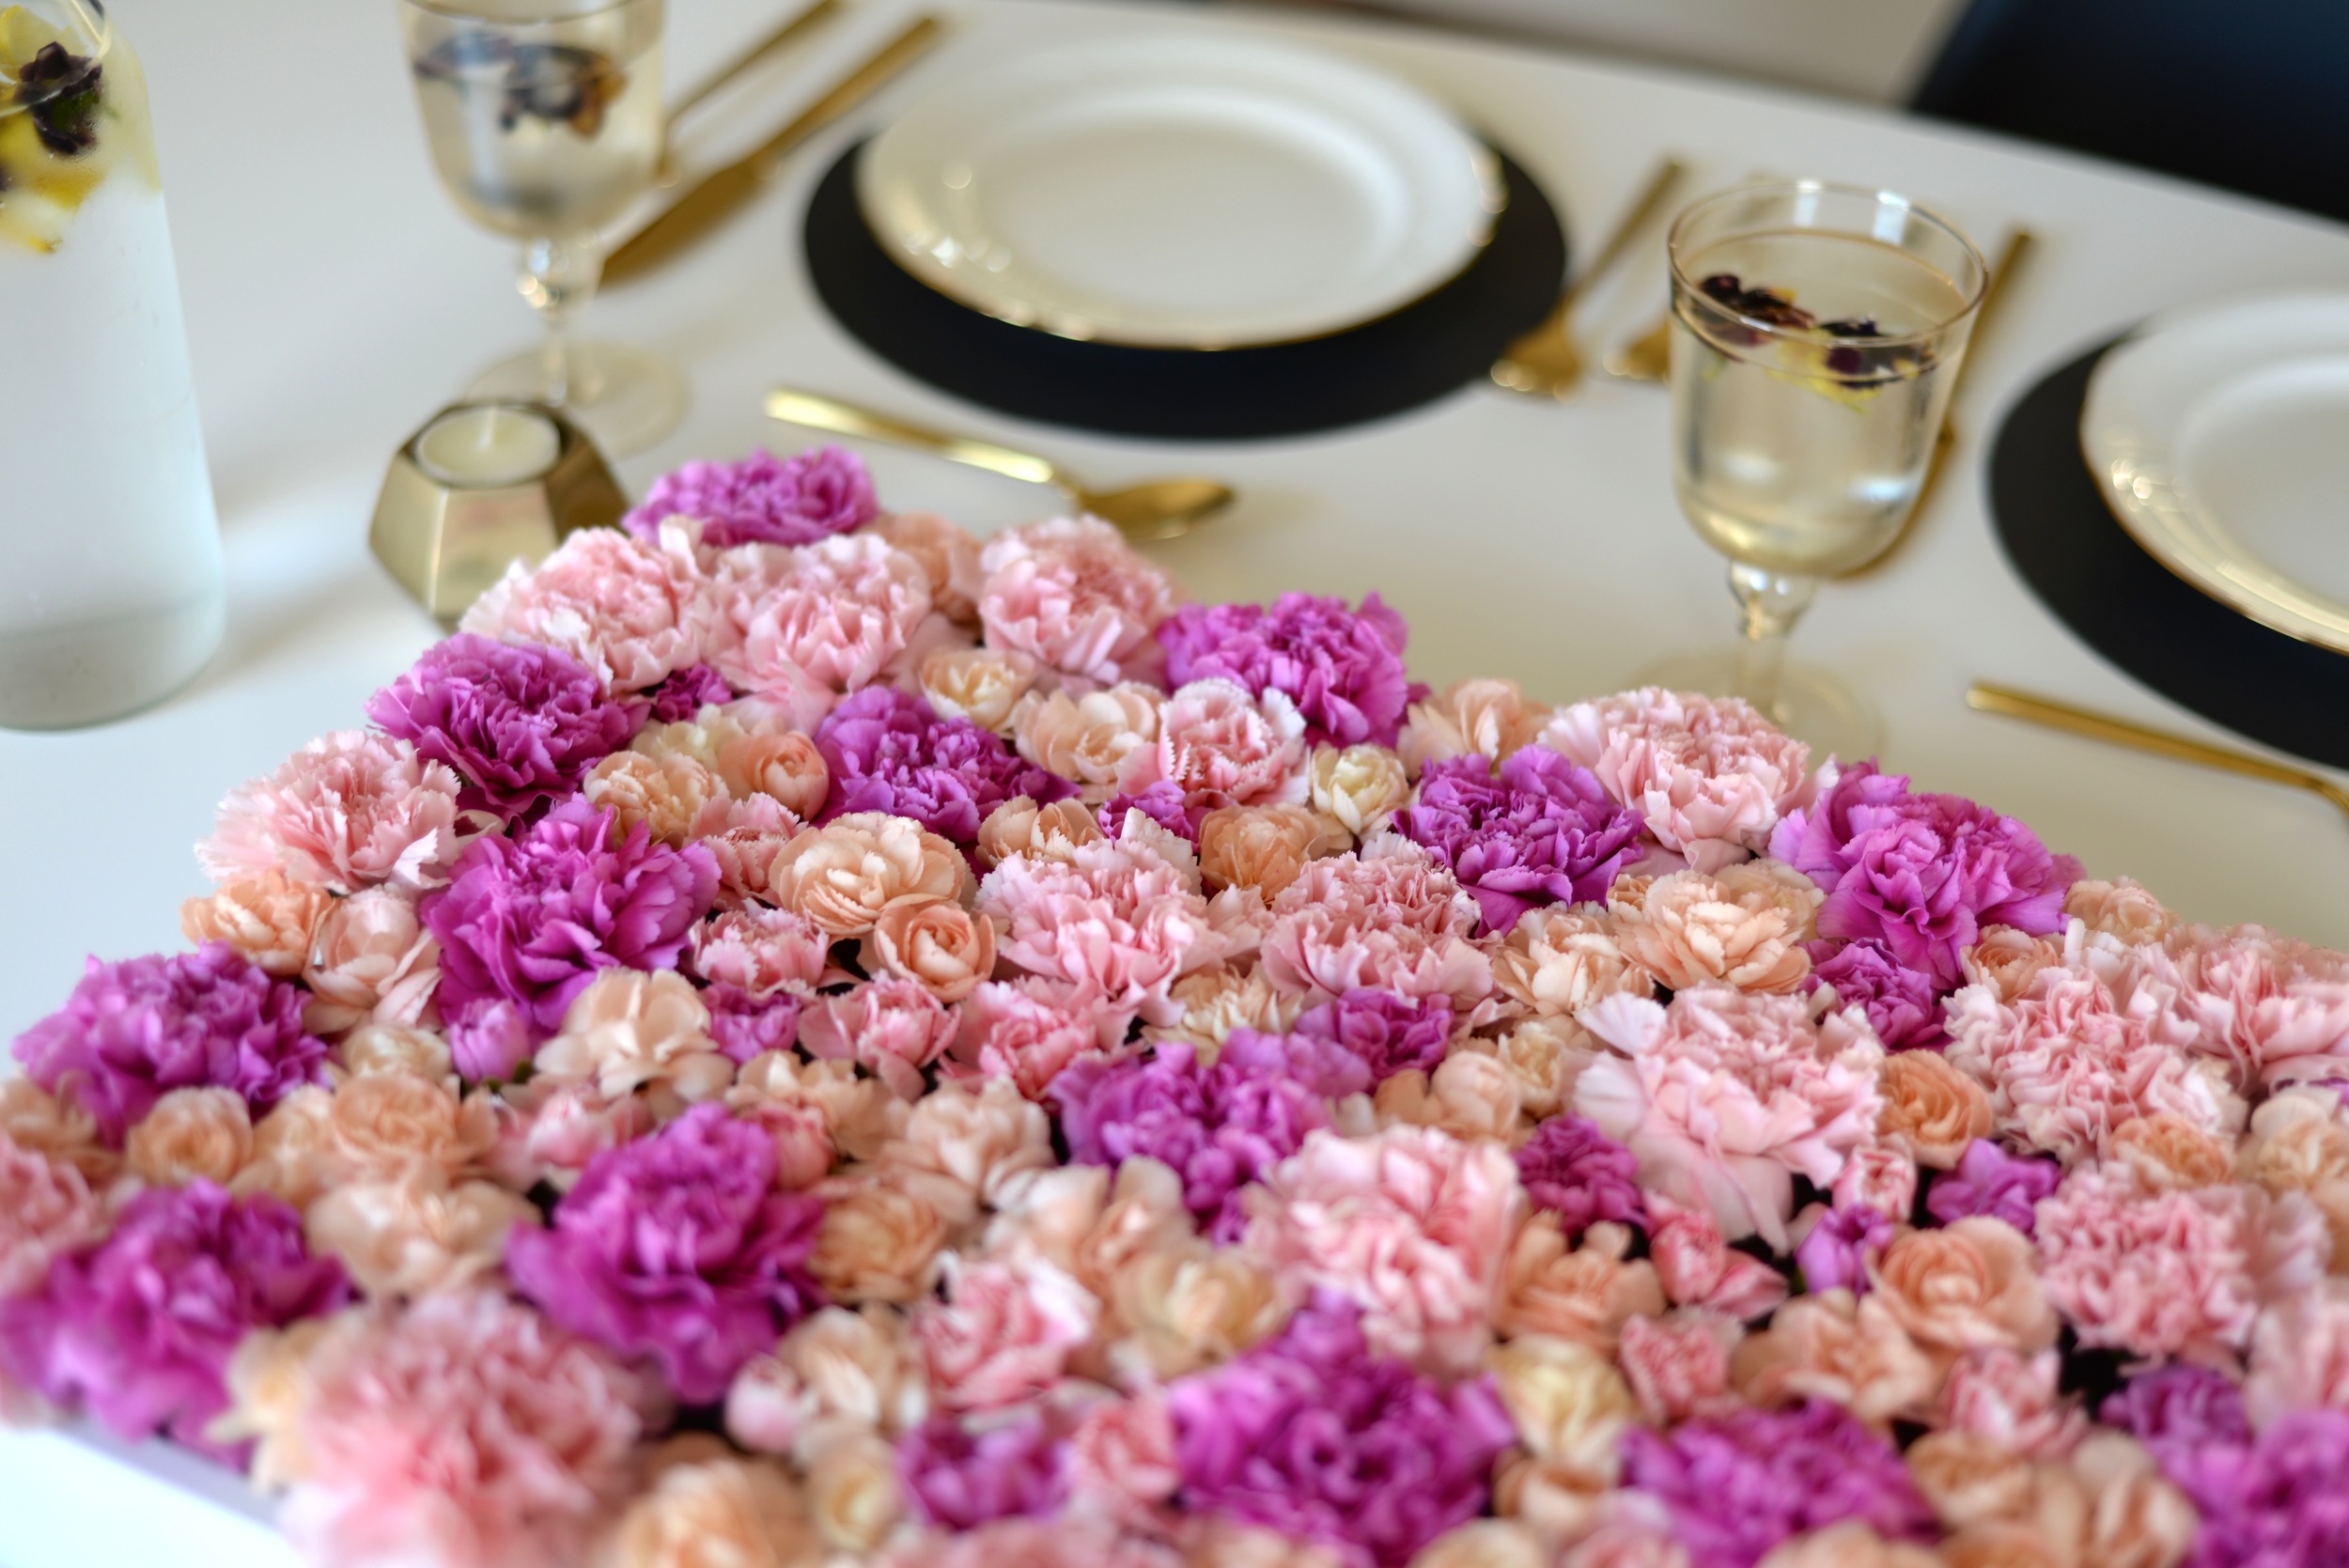
When you're done you are going to have an incredibly stunning centrepiece that is simple but so, so beautiful. I just love how this turned out and can already image it being perfect for a Mother's Day or Easter brunch or using poinsettias over the holidays for Christmas!
Happy DIY-ing everyone! And if you give this a try, make sure to use #204Park so I can check it out!